Full Issue: AccessWorld October 2020

Editor's Page: <i>AccessWorld</i> Celebrates Disability Employment Awareness Month

Dear AccessWorld readers,

Once again, AccessWorld celebrates Disability Employment Awareness Month during the month of October. Employment of people with visual impairments is a major mission of AFB and I personally believe that employment is the key to a full and complete life. If you are not familiar with the history of Disability Employment Awareness Month, My former colleague and AccessWorld Editor, Lee Huffman, explains it well:

The effort to educate the American public about issues related to disability and employment began in 1945 when Congress enacted a law declaring the first week in October as National Employ the Physically Handicapped Week. In 1962, the word "physically" was removed to acknowledge the employment needs and contributions of individuals with all types of disabilities. In 1988, Congress expanded the week to a month and changed the name to National Disability Employment Awareness Month.

I would also like to share with you the wise words of my former colleague, Joe Strechay. Joe operated AFB's former CareerConnect program for many years so had a great deal of experience on the topic of employment for people with vision loss:

Having traveled extensively around the United States and met with professionals, job seekers, teenagers, and adults who are blind or visually impaired, I have had the opportunity to learn about employment issues from all sides. Much of my job pertains to analyzing employment issues and creating resources to assist people with vision loss in becoming career ready.

In that vein, I am often asked the question, "What is the major factor affecting whether or not a person with vision loss is or is not employed?" Too often, I feel, people want to highlight a single reason as the major cause for the differential between being employed or being unemployed. Instead of offering one reason, I assert that the underlying factor is that there is such inconsistency around the United States in the training and preparation of people with vision loss from an early age through adulthood.

Neither public nor private services are created equally, and for that matter, no government or private entity offers those services in the same manner. This issue is larger than just vocational rehabilitation. It includes preparation in schools, nonprofits, various state agencies and services, and other important variables, including family involvement. There are a lot of fantastic programs and services available, but any given region may be strong in one service and lacking in another. I know this is obvious, but it needs to be said openly: our field needs to address our weaknesses and diligently work to make improvements.

Each job seeker with vision loss has his or her own challenges. Unfortunately, I still see a level of learned helplessness among young people with disabilities, even among the brightest. Learned helplessness refers to an individual being taught that things will be done for them, which allows them to not attempt to initiate or do things on their own.

This type of thinking sometimes extends to the perception of job seekers that vocational rehabilitation is designed to find them jobs, but really that is not the purpose. Vocational rehabilitation specialists definitely can help and guide, but they are not job placement professionals. Job placement is an art, a mix of sales, community relations, and having a well-defined pool of applicants.

Job seekers battle the perceptions of employers about vision loss and their own perceptions about navigating the employment process. At the same time, the technology divide between those who have appropriate access and mainstream technology and those who have orientation and mobility training, and those who do not, is apparent. Those with O&M training and technology skills have a better chance at finding, obtaining, and maintaining successful employment. In addition, job seekers are all individuals with strengths, skills, and weaknesses. All individuals have limitations, and not every job seeker is going to be a computer programmer, accountant, teacher, mechanic, or maintenance worker. The common thread typically is they want to be a productive and employed citizen.

Over the past 5 or so years, a new facet of employment, the gig economy, has emerged and risen to prominence. If you are unfamiliar with the gig economy, it is the system of primarily independent contractors or workers who use online job platforms. Think of Lyft, Uber, Instacart, DoorDash/GrubHub/Uber Eats and others. These workers sign up for a work platform and then work when they want, without set hours or a traditional work structure. The examples I gave above are on the visual side as they all require that the gig worker drive as part of their job, but there are other options that are more accessible to people with vision loss. In this month's AccessWorld, J.J. Meddaugh details two of the available online options for gig-based work.

We have been observing Disability Employment Awareness Month for many years now, and I would like to refer you to previous AccessWorld articles that, even though they were published in years past, still offer useful information. From the 2016 issue of AccessWorld comes Employment Perspective: Rethinking the Purpose of Work, by Neva Fairchild, and from October 2010, National Disability Employment Awareness Month: The Employment Process and Insider Tips for Getting the Most from Vocational Rehabilitation, both by Joe Strechay, are full of very helpful guidance, even a decade on from their original publication.

As always, we hope that you enjoy this issue of AccessWorld and find our articles helpful and actionable for you. If you have any comments, questions, or thoughts, you can send them to me by email.

Sincerely,

Aaron Preece

Acting Editor, AccessWorld

American Foundation for the Blind

October 2020 Table of Contents

Small Business in the Gig Economy: How Freelance Services have the Potential to Create Employment Opportunities for People with Visual Impairments

J.J. Meddaugh

You may have heard of the phrase the "gig economy," a term used to refer to jobs that are typically more short-term and paid based on the amount of work you do, as opposed to traditional jobs that pay a flat hourly rate. Uber and Lyft drivers, restaurant delivery workers, and Instacart or Shipt grocery shoppers primarily operate this way. In the online world, sites like Fiverr and Upwork make it easy for business owners to hire temporary help for specific tasks, or to sell freelance services to others on a per-project basis.

The gig economy offers flexibility for workers because they can choose the amount they want to work as well as the hours they wish to do their assigned tasks. Conversely, some believe that the rise of contract labor is resulting in people working harder for less pay and fewer benefits compared with traditional employment. The advantages and pitfalls of contract employment in the gig economy are largely outside of the scope of AccessWorld, but it is worth focusing on the accessibility of these online services for those who wish to be a part of the gig economy as a buyer or seller.

The Basics of Online Freelance

Online freelance marketplaces connect freelance professionals who offer services (sellers) to businesses and individuals looking for that service (buyers). Typically, this arrangement is best suited for standalone projects, though sometimes longer-term relationships are formed. The types of projects range in scope and complexity from logo or business card design to advanced programming and application development. Fiverr and Upwork are two of the most popular sites for connecting freelancers and hirers. I'll explore both the buying and selling sides of both of these services below.

Buying on Fiverr

Fiverr, with two Rs, gets its name from its original business model, where every service on their platform was available for just five bucks. Over time, the company realized the limits of this approach, and now five dollars is the starting price for available services, with many listings priced much higher. On Fiverr, sellers list the specific services they offer with a tagline, such as "I will design your company Facebook cover photo", "I will record an intro for your podcast," or "I will translate 100 words from Spanish to English." Selecting the specific service shows you a description from the seller, their history on Fiverr, including how many gigs they have completed, their typical response time, and customer ratings and reviews for the gig. Sellers are generally not vetted for gigs they post, so prior reviews, sample work, and price are the primary ways buyers choose among sellers. You can also send prospective sellers questions before choosing them for your project.

Sellers can also choose to offer gig extras, which are enhanced services to complement an existing gig. Someone offering to create an intro for a podcast may include things like background music, sound effects, or multiple sound formats as available extras. To purchase a gig, select the checkboxes for extra services you want to include if any, and then select the Buy button, which should update to show the total price for the gig, not including fees.

Once you have purchased a gig, you will usually be asked for detailed information from the seller so they can complete the work. This might be a script for an audio voiceover, or design ideas for a logo. All messaging between buyers and sellers is done on the platform, and you will receive a notification when they have completed the gig. Once a gig is complete, you will have a chance to approve their work or reject it and request changes, and also rate the seller on their performance.

I've personally used Fiverr for several company projects, and have always received the work I was promised. The quality has ranged from decent to amazing, with several sellers providing exemplary service. I often find it best to give someone a smaller project first to get a sense of the quality of their work, and then buy more if I am satisfied.

On the buyer side, most features are accessible to screen reader users, though there is the occasional hiccup. It's often difficult to locate links to sample work for a seller, because they are often displayed as graphical links without alt text. Similarly, the rating system presents itself as several unlabeled buttons, turning ratings into a bit of a guessing game. For the most part, Fiverr's services for buyers can be accessed by advanced screen reader users. iOS and Android apps are also available if you wish to work from your mobile device. We'll talk about selling your services on Fiverr later in this article.

Buying on Upwork

Upwork approaches the freelancer relationship a bit differently. The process for buyers starts by creating a job listing, which is done in a similar fashion to posting a job on a regular employment website. After giving a title and description, you are asked several questions to help hone in on possible candidates. These include the length of the job, whether you prefer to pay hourly or a fixed cost, and the timeline for completion of the work. You will also choose a category and subcategory, along with the experience level you'd like applicants to have. You can ask for a cover letter, or create specific questions that the applicant must answer when applying. Where Fiverr focuses on single tasks, Upwork allows you to hire someone for a longer or ongoing project. For instance, if you wanted to find someone to provide audio transcripts for a podcast, or customer service via email, these are jobs that could be posted on Upwork. Categories range from accounting and marketing to programming and human resources. Posting a job on Upwork is free. Upwork takes a cut of the freelancer's revenue for jobs completed through its platform.

Once you complete the job-posting wizard, your job will be visible to available candidates. You can then choose to search through available users who match your requirements and specifically invite them to apply to your job (recommended), or wait for applicants to come to you. Upwork gives more flexibility than Fiverr for both the jobseeker and client and lets you come to a mutual agreement on how the job or jobs will be completed. If there is ever a dispute in payment, Upwork will, upon request, jump in to help resolve the disagreement.

I have less experience with Upwork than I do with Fiverr, but have hired through the platform, and was satisfied with the work that was produced. I was less satisfied however, with the accessibility of Upwork's job posting wizard. Several of the screens in the wizard included choices, such as hourly vs. flat rate, which did not give any indication of which option was selected while testing with the latest version of Google Chrome and NVDA. The only workaround currently would be to complete the job posting and then look at the resulting page to see if the desired options were actually selected. There does appear to be some pages on the website which have received some level of accessibility support, and Upwork has an accessibility page on its site that allows users to request accommodations or submit accessibility feedback. So, while Upwork appears to be aware of their obligation to provide an accessible interface, there are still areas that come up short. The good news is that once you have connected with someone, you can communicate on your platform of choice, such as email, Zoom, or WhatsApp.

The Other Side of Freelance: Making Money

To this point, we've focused on using freelance websites to locate people and services to benefit your business. But there is potentially a gold mine of opportunity for people who are blind and visually impaired who wish to offer freelance services. Consider some of the benefits of freelancing on Fiverr, Upwork, or another similar service. Most jobs can be performed from home or a home office. You can generally set your own hours or work schedule. You can choose your preferred tools for completing the work. That's the good news. The less positive news is that it will likely take some effort to navigate and use the seller interfaces of Fiverr or Upwork. So not only do you need to focus on building your brand and service offerings, you also need to concern yourself with getting around the various accessibility pitfalls that these sites currently present.

As an example, I recently looked at the screen for posting a job on Fiverr in the voiceover category. While the basics of the form were easy to fill out, I encountered a string of options with no discernable checkboxes for input. So, when attempting to select a choice like Language, Age Range, or Gender, often the website would not make it clear on which option was selected. Yes, there is likely a workaround for a small issue like this, but it can provide a potential freelancer a great amount of discouragement when something as simple as posting your first job needs to be completed by trial and error or calling on a visual interpreter. I should add that Fiverr did not appear to have any particular page on its website about the accessibility of its service.

Aira does offer free minutes for small business tasks. Sponsored by Intuit, it can be used for tasks up to 30 minutes in length in a variety of categories. But this service is limited to business owners and not available to employees or others who may wish to post jobs.

There is a lot of potential for increased employment among people with visual impairments on these services. A quick sampling of available jobs included postings for transcriptionists, audio producers, website developers, language tutors, and accessibility testers. Users should not need to call on a third-party to complete their profile or post a job on these services. The irony that Fiverr and Upwork could use their own platforms to hire accessibility professionals to improve their website experience is not lost on this writer.

With all of that being said, if you are willing to put up with some frustrations, especially during the setup process, Upwork and Fiverr can provide a means for earning additional spending money, or even your primary income.

Conclusion

As the gig economy expands, more work will be done on a contract basis, with ultra-specialized workers performing similar jobs for multiple companies, or frequently moving from one company to another. For Fiverr and Upwork, it will take some much-needed accessibility improvements to their websites to make the entire experience pleasant and effective for screen reader users. Too often, we focus on the user-facing services of a website, or those that are intended for buyers. But it's just as important to recognize that people who are blind or visually impaired also wish to contribute to the selling and business side of the equation. All parts of these tools, whether intended for business owners or service providers, should be universally accessible. This will break down yet another artificial barrier preventing employment for people who are blind. We hope these and other sites will take accessibility seriously as they continue to develop their services.

This article is made possible in part by generous funding from the James H. and Alice Teubert Charitable Trust, Huntington, West Virginia.

Comment on this article.

Related articles:

More by this author:

October 2020 Table of Contents

Employment Matters: Laura Legendary, Owner, Elegant Insights Jewelry

Deborah Kendrick

When you hear Laura Legendary speak for even a minute or two, it will come as no surprise that she studied vocal performance and theater at California State University at Northridge (CSUN) or that she grew up in southern California. She has that sunny, easy way of chatting that throws fragments of vivid color into nearly every sentence and puts a positive (or at least whimsical spin) on just about everything that comes up.

But life was not always sunshine and lollipops for Legendary. In fact, one of the bleakest chapters in her life ultimately led her to the business she loves today.

Legendary had limited vision from birth, but it took a while to realize that she wasn’t just nearsighted. Diagnosed with retinitis pigmentosa, her vision continued to decline until, in early adulthood, she was completely blind. Her dream of pursuing a career in musical theater fell apart when she found she could no longer read sheet music or sight-sing on the spot for auditions. She learned braille and other blindness techniques and figured out various things she could do to earn a living. She did some computer consulting and some professional speaking.

Then, a bit later in life, she fell in love and got married. When her husband died less than six months after the wedding, Legendary’s world spiraled into that dark place conjured by tragedy. She struggled. She went to grief counseling.

Then, one day, someone gave her a sweet little worry stone. On one side the word “survivor” appeared. She couldn’t see to read that but, when her friend encouraged her to flip the stone over, her fingers fell on the same word, “survivor,” in beautiful braille! She ran her fingers over and over that stone and its warm braille and, in almost an instant, the inspiration for her now ten-year-old business was born!

Elegant Insights Jewelry

Legendary had never made jewelry before launching her business, but she had always loved beautiful things. She designed her own wedding and engagement rings and, as she puts it, “shared the jewelry gene” with all the women in her family.

She wrote a business plan, did her homework, and pulled together a team of people who could share her vision and turn her concepts and design ideas into wearable, beautiful jewelry.

That little gift prompted her to look for braille jewelry—necklaces, bracelets, earrings and more—that women and men could wear with pride and that would display messages in braille.

“We don’t just take a piece of metal and stamp a butterfly or some braille dots on it,” she says. Everything is made by hand and made with care. Her greatest joy is when her customers share with her compliments they have received. The fact that a bracelet or pendant or luggage tag has braille on it may not be the first thing a sighted observer appreciates, but the surprise that the braille is there is part of the fun.

And why, as Legendary likes to ask, shouldn’t braille be beautiful?

Her collection offers a wide range of jewelry with braille. From a necklace that says “I love you,” to a “Techlace” (bling with tiny USB drive included) that says “geek,” to military-style dog tags or her “dangle bangle”—you can select from a set of messages on the website or request a custom message. On all products, you can choose whether you want Grade 1 or Grade 2 braille and are given clear guidelines regarding the number of braille characters a specific piece can hold. There are luggage tags, key fobs, blingy purse charms and charms for your white cane. She has sets of wine glass charms – themes include maple leaves, discs, and more, with each charm embossed with a different braille word such as "truth," "trust," "hope," etc.

Photo of a grouping of four bracelets. They are called the Charmed by the Seasons Expandable Dangle Bangle Bracelets, and they are arranged in order from left to right: winter, summer, spring, fall. 
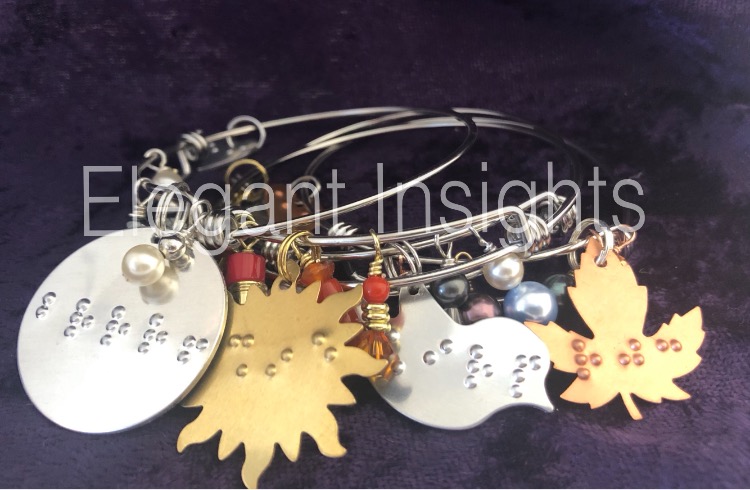
The Charmed by the Seasons Expandable Dangle Bangle Bracelets, arranged in order from left to right: winter, summer, spring, fall.

You can buy a braille embossed charm for your dog’s collar, a braille embossed zipper pull for any child or adult jacket, or a bookmark with a Mark Twain quote. The collection is large and creative and constantly growing.

Making It Work

Once she had developed a business plan and a team of talented individuals to turn her ideas into products, Legendary needed to find ways to spread the word and promote her products. Her energy on social media is as dazzling as her jewelry. The Elegant Insights Jewelry website includes descriptions and photos of many of her products. She manages the site herself, writes all the descriptions with her characteristically bright language, and gives clever names to each new item and collection.

This is our brand new Sparkling Snowfall purse charm. It is lying on a purple background.

The brand new Sparkling Snowfall purse charm

Her first public presentation of her products was in the summer of 2011, with an exhibit at the American Council of the Blind convention in her own state, Nevada. Since then, she has exhibited at several state and national conventions of the American Council of the Blind, National Federation of the Blind, Blinded Veterans Association, and others, but says it is just too costly to attend every year. Despite her gift for conversation and promotion, she says she is basically a private person and rarely leaves her home or home studio.

She maintains a presence on Facebook, Twitter (@ElegantInsights), and Instagram, hosts a blog called Sparkle On, and writes a newsletter.

She co-hosts a podcast called Fashionability, dedicated to holding conversations with people promoting products or services to include people of all abilities in the world of fashion.

Let’s Go Shopping

When the coronavirus brought much of our country, particularly retail, to a standstill, Legendary had another inspiration. With everyone staying home, blind people weren’t getting any shopping done and blind entrepreneurs weren’t having opportunities to display or demonstrate their wares. Thus, the first Let’s Go Shopping virtual event evolved.

Legendary talked with another blind business owner and entrepreneur, Brent Harbolt of the Harbolt Company, who offered her a Zoom room for her virtual event. She got the word out, interviewed and invited ten or twelve fellow blind entrepreneurs, and an all-day virtual mall crawl was launched.

The event was 12 hours long. A schedule was posted in advance announcing vendors and time slots and Legendary kept the schedule moving. The turnout was so huge that, as Laura puts it, “we broke the Zoom room!” They had to purchase more space for more invitees.

The first event was not without its disasters. Zoom bombers invaded the gathering, hurling insults and displaying pornographic images. Still, the vendors and shoppers carried on, repeatedly booted the invaders, and the overall success was so tremendous that Laura was soon planning another Virtual shopping event.

The first Let’s Go Shopping event was a single 12-hour day. The next, for dads and grads, was three days, and the most recent was a September two-day event for back-to-school and early holiday ideas. The events have been hugely successful and planning is under way for yet another in November.

Legendary coordinates the whole virtual mall crawl, interviewing and selecting vendors, promoting on social media, and editing the recordings of the presentations for customers who missed the live event.

Tools for Success

Elegant Insights jewelry is run entirely from Laura Legendary’s laptop and iPhone. She personally manages the website and all the social media, the processing of orders, and promoting of new products. Asked to identify the essential elements of her success, she named persistence, the willingness to work long and flexible hours, and plenty of physical and mental stamina.

Essential elements she did not name but clearly possesses are boundless energy, creativity, passion for her product, and enthusiasm to share it with others.

Her business supports her, she says, but not without extremely hard work.

She loves that she is living her life on her own terms. She has created her own path. Asked if she would recommend building one’s own business to other blind individuals, she said, “It’s a way of buying yourself your own job.”

Interested small business owners who are blind or have other disabilities are invited to contact Laura Legendary for information on participating in the next Let’s Go Shopping virtual event. To learn more about Elegant Insights Braille Creations, call Laura Legendary at 702-605-1265, or visit any of the links in this article.
This article is made possible in part by generous funding from the James H. and Alice Teubert Charitable Trust, Huntington, West Virginia.

Comment on this article.

Related Articles:

More by this author:

October 2020 Table of Contents

Chase Crispin: Becoming Employed As a Blind Adult

Jamie Pauls

Chase Crispin has always had a passion for three things: technology, music, and teaching. Born in 1997, he isn’t quite old enough to remember the days of manual typewriters, but he certainly has seen assistive technology for the blind come a long way in his 23 years on the planet. That technology, along with a lot of hard work and attention to detail, has enabled Crispin to become a gainfully employed young man who just happens to be totally blind. In the following paragraphs, you will learn Crispin’s story and possibly discover some tips that might help you or someone you know land a really good job without letting the challenges of blindness become an insurmountable hindrance to that goal. There are no quick steps to success, no formula to follow to ensure that all the obstacles will melt away. Instead, you will see a pattern of hard work and optimism that eventually paid off for Crispin, both literally and figuratively. I play a part in Crispin’s story, but only a small part. The conversations I’ve had with him in preparing this article have been both enjoyable and enlightening. I trust that readers of his story will come away as refreshed from your reading as I have been from the writing.

In 2007, Crispin was at home when he should have been in school. He wasn't playing hooky; he had pneumonia. His orientation and mobility teacher knew how much Crispin loved assistive technology, and thought he might enjoy working with the new Braille Plus the school had just acquired from The American Printing House for the Blind (APH). She brought the notetaker to Crispin's home, and he immediately began working with it during his recovery. By the time he returned to school, he couldn't wait to show his teacher what this new gadget could do. She asked him if he would be willing to record some videos of him working with the device for the benefit of other students, and he was interested. His teacher had connections at APH, and the company eventually placed links to Crispin's videos in their newsletter. He tells me they still exist on YouTube to this day.

In 2008, to celebrate its 150th birthday, APH held a writing contest where students were invited to submit an essay on the importance of technology in their lives. Crispin won the contest and got to visit APH headquarters. It was during this time that Larry Skutchan, APH's director of technology product research was producing the wildly popular Blind Cool Tech podcast. Sadly, archives of this podcast are not currently available on the Web. Crispin has a vivid memory of hearing Skutchan's familiar voice in the hall at APH, and had the privilege of going to lunch with him later that day. Over lunch, Skutchan recorded a podcast where he interviewed young Crispin, who spoke with a maturity beyond his years. Product demos followed, and Crispin's voice became familiar to the blind community. His task-oriented approach to teaching, along with his attention to detail, made his demos a hit. He stayed in touch with Skutchan, and was a beta tester for various APH products over the years.

In 2009, I was a part of Main Menu, a weekly technology show produced for ACB Radio. I eventually hosted and produced the show until the fall of 2011. During one episode, I brought together several high school students to discuss how they used technology in school. Crispin was on that panel. I eventually invited him to become a regular part of the Main Menu team. When I left the show at the end of 2011, Crispin became its executive producer until September 2014, when he realized his high school and college studies should take first priority.

For years, Crispin thought he wanted to become a computer programmer and work with his mentor Larry Skutchan at APH. During his junior year of high school, he took a computer programming class and realized that programming didn't interest him in the way he thought it would. He liked to move around too much to be tethered to a desk all day. Besides, he wasn't as interested in what made technology work as he was in actually getting the most out of it and teaching others how to do the same.

For most of his life, when he wasn't playing with technology Crispin was playing music—piano in kindergarten, clarinet and sax in 5th grade, and choir throughout his school years. Crispin was as serious about his music as he was about technology, entering competitions and playing in his school's Jazz band. He decided to combine his love for music with the teaching skills he had acquired while producing all those videos and podcasts on how to use assistive technology.

He decided to major in music education and attended Nebraska Wesleyan University near his home in Lincoln. During an earlier visit to another college, a professor expressed doubts about a blind person being able to successfully teach music. NWU had no such reservations, and he was soon a part of regular college life, even visiting Spain for six weeks at the end of his first year.

Crispin didn't learn braille music when he was in high school, but developed a system of his own that worked well in conjunction with recordings and his ability to play by ear. By the time he reached college, he realized he needed to know the braille music code. A course from Hadley got him up and running with braille music, and he hasn't looked back.

Crispin now teaches 6th- through 8th-grade music classes for the Lincoln, Nebraska, public school system. He uses a door alarm to alert him when students enter or leave the classroom. He uses a Macbook Air at school, and posts information such as the day's agenda to an Apple TV. BARD from the National Library Service for the Blind and Physically Handicapped offers many of the music books and scores he requires, but software from Dancing Dots allows him to emboss volumes of music in hard copy braille.

When I asked Crispin what piece of technology he would most hate to give up, he told me that he could not do his job as effectively without his Dot Watch. He is able to keep track of time, read text messages, and deal with many other notifications without the need for speech. Crispin says fast speech and fast braille reading help him be as productive as he can be.

Sighted people often have never had extended interactions with a blind person, and Crispin is very open to answering their questions, demonstrating how he uses technology, and any other topics of interest to them. Dressing professionally and looking in the direction of the person to whom he is speaking are also important. Crispin is not shy about making his colleagues aware of mistakes they may be making when working with blind children, such as the time the teacher in a classroom allowed a blind student to face the back of the room because, after all, he was listening and couldn't see content being displayed anyway. Crispin asserted that this was not okay, and that the professionals involved with this child's education were doing him a disservice by allowing this behavior.

As much as Crispin uses cutting-edge technology, he also uses devices as simple as a braille labeler to more easily identify file cabinets, and to keep track of bleach and hand sanitizer bottles that feel the same.

Crispin does a lot of freelance work for various churches in his community, playing piano and organ for Sunday services. He uses Uber and Lyft to travel to his job sites, and the ever popular AIRA and Be My Eyes services are close at hand as well.

Finally, Crispin is an iPhone user. When he was in Spain, his host family didn't speak English and he didn't speak Spanish. He now has a minor in Spanish. He has a lot of food allergies, so he frequently looked up the ingredients of dishes he was eating to make certain they were safe for him.

Crispin currently teaches part time, and in light of COVID-19 he is okay with that. He needs to get close to students and touch instruments to do his job successfully. Eventually, he wants to teach full time, and grad school is in his future.

When asked what areas of technology he would most like to see advancements in, he mentioned Web accessibility improvements in Google Classroom, which he uses in his daily work, and more automated music translation that would come closer to current OCR software.

Throughout the course of my interview with Crispin for this article, I was repeatedly struck by his attention to detail. One example of this is the fact that, although students must call out to him in class because he can't see their raised hands, he asks them to go ahead and raise their hand as they call out to him. This keeps them in the habit of raising their hands in class, which is the accepted practice in most every classroom. After student teaching for a group of young students, their teacher later told him that even after he left, the students still called out their name as they raised their hand. It was as though they associated this particular protocol with music class.

So what can we learn from Crispin that will help us on the road to successful employment? First, work hard. Second, take nothing for granted and pay attention to the details. Third, think outside the box. Whether it's a simple solution or one that requires the use of multiple screen readers to accomplish a task, it's important not to give up when you may be just in reach of your goal.

What does the future hold for Chase Crispin? It's anybody's guess, but we probably haven't heard the last of this inspiring young man.

This article is made possible in part by generous funding from the James H. and Alice Teubert Charitable Trust, Huntington, West Virginia.

Comment on this article.

Related articles:

More by this author:

October 2020 Table of Contents

A Review of the Google Nest 3rd Generation Learning Thermostat on iOS Devices and Amazon Alexa

Janet Ingber

Wireless thermostats have changed how we control the heating and cooling of our homes. With proper device installation and app setup, you can control house temperatures and times through an app on your iPhone or iPad. This is a considerable convenience with an added bonus: it may save money in heating and cooling bills.

The Google Nest 3rd Generation Learning Thermostat is accessible and easy to use. You can add optional temperature sensors when you install the thermostat, or you can easily add them later.

The Nest Learning Thermostat can be controlled in several ways: at the thermostat itself, with the Nest app, with the Google Home app, or with Amazon Alexa. You need vision to control the device at the physical thermostat, but the apps and Alexa do not require sight.

The 3rd Generation Nest lists for $249, but it's frequently on sale. Check with your energy company to determine if you can get it for a reduced price or if a rebate is available. Rebate offers can vary widely over time and can be substantial.

Make sure to check all sites belonging to your energy company. Con Edison of New York had an offer on one site that was considerably different from one on the Con Ed Marketplace.

Google offers another, less expensive, thermostat, the Nest E, which includes many, but not all, of the same features as the Nest Learning Thermostat. The Nest Learning Thermostat supports a wider range of heating and cooling systems. According to Google Chat Support, as of September 2020 the Nest Learning Thermostat is not compatible with Apple HomeKit.

Getting Help

You can find a lot of information on the Nest Thermostat support page. Although Nest does not offer direct phone support at this time, you can chat with tech support online and also chat with a Google Nest Specialist.

What’s in the Box

The Nest’s box measures 6.5 inches x 6.5 inches X 3 inches. The top of the box lifts off. Inside, the topmost item is a cardboard sleeve that holds installation instructions and a card with tape labels for marking wires. The card provides contact information for professional installation and also explains how to begin the set-up with the Nest app. There is a Safety, Warranty & Regulatory guide and a fold out-booklet called “Meet the Google Nest Learning Thermostat.” None of these documents is in an accessible format. I scanned them with Seeing AI and KNFB Reader. Neither was able to recognize all the pages, but this same information can be found at the support link listed above.

Under the sleeve in the box is the thermostat display, which has a shape similar to a hockey puck. It's made of hard plastic and is seated in a cardboard holder. Over the display is a plastic film for protection that you should remove after installation. The display is 2 inches in diameter.

Underneath the display's cardboard holder you will find a small screwdriver, two wall screws, and the Nest’s round base.

In the box’s third level is an approximately 4.25 inch by 6 inch white decorative trim plate that can be mounted behind the thermostat to cover part of the wall. It is optional. In the box are also a steel plate and screws. These are installed in the wall if the old thermostat had a junction box implanted. If you do not already have a junction box mounted, the plate and screws can be discarded.

Google Nest and Google Home

For installation, setup, and control of the Nest Thermostat and any sensors, you need to download the Google Nest app and the Google Home app from the App Store. The Nest app is available for iPhone, iPad, and Apple TV and requires iOS 12 or later. The Home app is available for iPhone and iPad and requires iOS 12 or later.

Installing the Nest Learning Thermostat

Before anything else, the critical first step is to make sure that power is completely off for all systems, including heating, cooling, and the old thermostat. This is likely controlled by a fuse or circuit breaker box. There may be an emergency shutoff switch. There may be backup batteries in the old thermostat. Do not skip this step.

In order to install the Nest Thermostat, you must have usable vision. You need to label, choose, and attach the correct wires according to their color codes. You will need to see the leveling device that is part of the thermostat. You also need to make a decorative decision about whether to use the trim plate according to how the new thermostat covers any wall space used by the old thermostat. For optimal installation, you may wish to contact an HVAC company.

The Nest Learning Thermostat has an online installation manual, and the Nest app also gives instructions for installation. To start, open the app and sign in with your Google Mail account or, if you already have Nest products in your home, sign in with Nest. Follow the prompts. You must give Nest access to Bluetooth. Next, activate the Add button and select the thermostat. Instructions for installation will be on your screen. Since Nest communicates via WiFi, you may need to reposition your router for a strong signal.

Nest App

In the upper-left corner of the Nest app screen are two useful menus, Nest and Settings.

When on the Nest menu, VoiceOver says “Open Nest Menu." Within the menu are a Messages button and a Support button. If you need help, activate the Support button to bring up the Nest support page. Toward the bottom of the page is a Chat link that can be accessed easily with headings navigation.

If you want others in your household to have access to the thermostat, you need to add them to the app. Go to Settings/Family. Activate the “Add a home member” button. The next screen has two options, “Cancel” and “Open Home app.” Open the app to start the invitation process.

The Nest Learning Thermostat gradually learns your schedule and your preferred settings. Your iPhone needs to be set up for Nest to know when you are home or away. Go to Settings > Account > Phone Location to turn this feature on.

Google Home

Invitations show up in the main screen of the invited person’s Google Home app. They just have to accept the invitation. After I accepted my invitation, the thermostat was listed in my Google Home app. In addition to connecting the thermostat, Google Home gave me options to connect my Netflix and Hulu accounts.

Once you are set up with Google Home, you can invite others to access your devices.

The Google Home app has three tabs on the bottom: Home, Feed, and Talk to the Assistant. The Home tab is the main screen. The Feed tab shows recent events. The Talk to the Assistant tab accesses Google Assistant.

Controlling the Thermostat with the Nest App

On the main screen of the Nest app are the Nest and Settings menus followed by whether the thermostat is set to Home or Away. Having Nest recognize your cell phone lets the thermostat know if someone is home. Flicking right, VoiceOver will speak current weather information. Keep flicking right until you hear your thermostat’s name (mine is “Hallway”). VoiceOver then speaks the target temperature. Double tap on the thermostat’s name to select it.

On the new screen, there is a Settings button that has numerous buttons including safety temperatures and economical heating and cooling temperatures. Flicking right, VoiceOver will speak the target temperature and current temperature. Temperature setting is a picker item so just flick up or down with one finger to adjust. VoiceOver will say the new temperature as you make changes. There is no “Okay” button; Nest automatically makes the adjustment.

There also are buttons to adjust the temperature up or down one degree at a time. VoiceOver does not give any feedback but there is a “click” sound each time a button is pressed.

Check your thermostat’s target temperature to insure it has been set properly. Below the temperature change buttons it gives information about indoor humidity and outside temperature.

Across the bottom of this screen are five tabs: Mode, Eco, Fan, Schedule, and History. Mode gives options to set the thermostat to Heat, Cool, Heat and Cool, or Off. VoiceOver will say the new setting. Eco allows the thermostat to control the temperature, setting it to values that can save on energy costs. Press the Start Eco button near the bottom of the screen. Your main screen display will say Eco and there is a graphic of a green leaf that VoiceOver does not indicate. Eco temperatures on the day I wrote this were 53 degrees and 85 degrees. This means that the thermostat would begin to cool once the temperature reached 85 degrees and would begin to heat at 53 degrees.

The next tab is Fan. Activating this tab opens a box where you can set how long the fan should run in increments up to 12 hours. Next is Schedule. VoiceOver says “landscape” but does not say which way. The side and volume buttons are toward the left. If you have a Home button, it is toward the right. Touch the very left side of the screen and VoiceOver will start to speak days of the week. Flick left or right to access a specific day. You don’t need scheduling unless you manually want to control the thermostat. A main feature of this unit is that it learns your habits.

The final tab is Energy. Here is where you can view how many hours a day your system was actively heating or cooling your home.

Controlling the Thermostat with the Google Home App

On the Google Home main screen, select your thermostat. On the next screen, there is a Close button, a button to open the Nest app, a settings button, and a More Options button, which when activated has help information and a place to leave feedback.

Keep flicking right until you hear information about your heating or cooling settings. Buttons to decrease or increase the temperature by one degree are below the temperature settings. VoiceOver does not give any feedback, and no sound is made when the buttons are activated. You can verify the change as you would in the Nest app.

Underneath these buttons are the indoor temperature and a Mode button. Mode choices are Heat, Cool, Heat and Cool, Eco, and Off. VoiceOver does not give feedback about the selection.

Controlling the Nest Learning Thermostat with Your Amazon Echo

Although the Amazon Echo can't perform all the tasks that the Nest app can, it still provides useful information and allows basic tasks.

Before beginning the linking process, you must install and be signed into the Nest and Google Home apps. If you have more than one WiFi network, make sure any Amazon Echo and the thermostat are on the same network. Only people who are on the account list can enable the Nest Alexa skill.

Adding a New Device

Open the Alexa app and go to the Devices tab. Select the Add a New Device or Group button. On the next screen, select Add Echo, Smart Home, and Accessories. On the next screen is a long list of devices; select Thermostat. On the next screen, select Google Nest.

You then will be instructed to download the Nest app and set up your thermostat. If you have not already done so, do it now. Then activate the Continue button to go to the Alexa skills store to enable the Nest skill. Once there, select Enable and a new screen will load. You will be asked to enter your user name and password. The rest of the setup process involves giving permission for the Echo and Nest to communicate.

Echo Commands

When you issue a command, you need to say your thermostat’s name. If the word “Thermostat" is part of your thermostat’s name, leave it out of the command. My thermostat’s name is “Hallway.” If I want to raise the temperature one degree, I would say, “Alexa, Hallway up one.” 

You can also tell Alexa to set the thermostat to a specific temperature. For example, I could say, “Alexa, set Hallway 77.”

Check house temperature by asking “Alexa, what’s the temperature in the house?” You can also ask Alexa what the temperature is set to. If you do not give Alexa a specific temperature or number of degrees to raise or lower, by default the temperature will be changed by 2 degrees F or 1 degree C. The thermostat’s mode also can be changed with Alexa. For example, I could say, “Change Hallway to Cooling Mode.”

Visit Control your Google Nest products with Amazon Alexa for more Alexa commands and information visit

Nest Temperature Sensor

Most rooms in a home are not the same temperature. Using a Nest Temperature Sensor allows you to select where your home temperature is measured. When you select a sensor, your thermostat will take readings from the sensor instead of the thermostat. As of September 2020, the Nest Temperature Sensor does not work with Amazon’s Alexa, though it can be controlled with the Nest app. After spending a lot of time with Google Support, I learned that the sensor can't be added to Google Home. A workaround is to use Google Home and just open the Nest app from there.

Sensors are not very expensive and do go on sale. The Google Store had them for $39.00. They may come bundled with the thermostat at a discount.

Installing the Sensor

It's possible to install the sensor without vision. The box measures 4 inches by 4 inches by 1.5 inches. Both the thermostat and the sensor instructions say to “Use the Nest app to start setup” and then have you download and use the installation guide. In the box, under the paperwork, is the sensor. It's primarily plastic, 2-1/8 inches in diameter and about one inch high. The top of the sensor has a tactile Google G logo. There's a small screw for replacing the battery on the back, along with a slot for hanging the sensor on a wall screw. There is a small plastic battery pull-tab sticking out on the side. Do not remove it yet. In the next level in the box is the screw for hanging the sensor on the wall.

Open the Nest app and select Add Product from the Settings menu. The first step is to scan the sensor’s QR code. With the sensor in the upright position, the code is printed on the battery pull-tab on the side that is facing up. Authorize use of your phone’s camera and move it around. You will hear a sound when the QR code has been scanned. Continue to follow the prompts for installation. At one point, you will be asked to remove the battery pull-tab in order to activate the sensor. The battery is a Duracell Lithium CR2 3V that lasts approximately two years and costs approximately $2.50 to replace. Continue set-up procedures and place the sensor where you plan to use it.

Controlling the Sensor with the Nest App.

If you set up a Nest account, both the thermostat and sensor will be on Nest’s home screen. Otherwise, both devices can be controlled by selecting the thermostat on the main screen. If you want both devices on the main screen, open the Nest app and select Settings. Go to Spaces and select the sensor. The Spaces setting gives you a list of Nest products in your home. Now the thermostat and sensor will be on the main screen.

Below the devices is an unlabeled button, which when activated brings you to a screen with both the thermostat and sensor. It is mostly the same screen as the screen for controlling just the thermostat but with one important change. You will need to choose whether the temperature is controlled via the thermostat or the sensor. Sighted people will find a dot next to the selected device’s name. Unfortunately, the Nest app does not offer any audio confirmation of the selected device. Before adjusting the temperature, select either the thermostat or sensor and then make your change. For example, if you want your bedroom to be cooler at night and the sensor is in your bedroom, select that sensor and then adjust the temperature. Nest will use the bedroom sensor’s setting rather than the thermostat’s setting.

Conclusion

If you are in the market for a new thermostat, the Nest Learning Thermostat is a good option. It’s convenient and easy to use after a little practice. It would be more accessible if both the Nest and Google Home apps gave feedback when using buttons to change temperature. It would be a big improvement to have Amazon Alexa work with the Nest Temperature Sensor. Also, the sensor should be able to work with Google Home. But the advantages of the Learning Thermostat substantially outweigh any disadvantages.

Product Information

Product: Nest 3rd Generation Learning Thermostat

Manufacturer: Google

Price: $249 (often discounted)

This article is made possible in part by generous funding from the James H. and Alice Teubert Charitable Trust, Huntington, West Virginia.

Comment on this article.

Related articles:

More by this author:

October 2020 Table of Contents

The Patriot Pro 12.9 Portable Video Magnifier for Business or Classroom

Steve Kelley

Think about the last time you went into a business meeting or a classroom and wanted both a laptop and video magnifier with you, but didn't have the desk space or the ability to carry all that gear. Chances are you left the video magnifier at home and did your best with a magnifying glass or small portable handheld video magnifier, and really, really missed the larger video magnifier. What if you could have both, in a really portable, accessible format?

Imagine a portable system with a 12.9-inch screen, the lightweight and thin form factor of a tablet, with all the powerful office apps and features you'd expect to find on a full-featured tablet, like an iPad Pro, plus a video magnifier built right in? Pack it all up in a carrying case no larger than what you'd expect with a more conventional laptop, and you'd have the Patriot Pro from Patriot Vision Industries.

The Patriot Pro uses an iPad Pro mounted on a sturdy stand to deliver plenty of computing and productivity power, paired with video magnification and optical character recognition (OCR) software to provide a really light, portable system that's ideally suited for the office, classroom, or travel.

The iPad slides firmly into the folding stand and clips securely in place. The stand has three panels: one serves as a base and table for printed documents, the second panel folds upright from the base at 90 degrees, the third panel holds the iPad so that it can be positioned parallel to the base for document viewing or swiveled all the way around so that the camera is facing outward instead of down for more distance viewing. In the stand, the iPad can be positioned at virtually any angle needed to use it as a conventional iPad, with all your favorite apps, or as a portable video magnifier.

One of the best features of the Patriot Pro is that it can be used without the learning curve of the iPad Pro, if needed. Turn the iPad Pro on, swipe up the screen to get to the Home screen and look for the icon in the dock that looks like a magnifying glass or that is labeled "magnifier" by VoiceOver. Open the Magnifier app and the Patriot Pro is a simple to use, portable video magnifier. There's no need to return to the iPad Home screen or any of the other features of the iPad to use the video magnifier, unless of course you want to.

The Magnifier App

When the Magnifier app opens, the screen displays a live view through the iPad camera with a menu at the bottom of the screen. From left to right, the menu options are: Table Mode, Light, Color Mode, Settings, and Reader. In the live view, the image size can be increased or decreased using either a 2-finger spread or pinch gesture, or the 3-finger iPad Zoom gestures. In this view, text or objects viewed through the camera can be magnified as needed and color filters used to enhance the contrast, using the Color Mode described below, or simply a two-finger touch to the screen to cycle through the options.

The Magnifier Menu

Here's a more detailed look at the five menu items that appear as circular icons at the bottom of the screen.

Table Mode is a toggle used when using the Reader. By default, the Table Mode is turned off. In the default position the reader will read column by column from top to bottom, left to right. This would be the setting you would use to read a newspaper or magazine article with multiple columns. Turning Table Mode on enables the Reader to read across multiple columns, such as when reading rows of information formatted in a table, like bank statements.

Light toggles the iPad light on or off to optimize the lighting for video magnification or for taking a picture needed for OCR.

Color Mode enables the user to quickly cycle through various color filters. A total of 11 filters are available, and these include an inverse light-on-dark, a high-contrast dark-on-light, greyscale, and other high-contrast color combinations. Color mode is an option in both the live video magnifier and the Reader, so filters can be tried and selected on the fly and customized for whatever is being read.

Reader takes a picture of whatever is in the live view, and converts it, in seconds, into text that is read out loud with the app's text-to-speech. There are two options that can be toggled from the Settings menu under Reading Mode, Original and Wrapped. In the Original view, the document appears in its original format and the text is highlighted as it is read. Wrapped view formats the text from the document into plain text wrapped to the width of the screen. A terrific feature built-in here is that a two-finger spread or pinch gesture on the screen will increase or decrease the size of the text, while automatically reformatting the text so it continues to wrap within the screen, so there's no need to scroll left or right on the screen as the text is read. Just as in the Original format, the text is highlighted as it is read.

Settings includes more global options for Speech Text, Language, Brightness, and the Reading options mentioned previously. The text option offers several color combinations that can be used with menu foreground and background colors. Although there is no option for text size, these screens can be magnified using the iPad 3-finger Zoom gestures. Speech options include nearly 60 voices in many languages, as well as adjustments for reading rates. It's worth noting here that the Speech options are for the Reader/speech for the various menus is enabled using the iPad's VoiceOver text-to-speech.

The Magnifier app also offers an Easy Mode, which reduces the menu icons at the bottom of the screen to a single one, Reader. Press and hold this icon for 7 seconds to toggle between Easy Mode and Advanced Mode. Easy Mode reduces the number of icons on the screen, including Settings, and frees up a bit more of the screen in Live View.

The Patriot Pro in Action

With the iPad positioned parallel to the base, the camera faces down and the screen up. The camera is located near the right front side, so reading material needs to be positioned toward the right side when viewing a document. The magnified image is sharp and clear, and remains that way as the document is moved beneath the camera. Focus adjusts automatically and quickly. A touch to the screen will also reset the focus. Because of the camera location, reading a book or magazine in the live mode with the tablet positioned in landscape mode is clumsy. It's difficult to get the bottom of the document within view of the camera. Moving the Patriot Pro to a portrait orientation works much better.

For most extended reading tasks you'll use Reader, which converts a photo of a document into digital print, which can be read in Original or Wrapped view. Document processing is quick, and the OCR results are adequate. OCR results are dependent on document positioning when you're capturing the image. For example, text near the spine of a book is not recognized as accurately as that in the center of the page, and the text of a document placed at a bit of an angle on the base is not recognized as accurately as it is when straightened.

As mentioned earlier, the Patriot Pro can also be used for distance viewing, for a lecture or presentation, for example, by positioning the tablet camera outward instead of down toward the base. You can enhance distance viewing by adding the optional Sony Cyber-Shot camera available from Patriot Industries. The camera is mounted on a flexible arm that clips to the Patriot Pro and connects wirelessly to the iPad.

The Magnifier app works with VoiceOver with some notable exceptions. The magnification gestures in the Live view do not respond with VoiceOver on. In addition, VoiceOver does not fully stop when the Reader begins reading, which makes it difficult to hear the document clearly. If you want to use VoiceOver with the app you'll need to turn it off at various times to use certain features.

The Bottom Line

The Patriot Pro takes a portable video magnifier to the next level by adding it to the iPad Pro on a versatile, sturdy system. Both tablet and stand weigh a total of 8 pounds, so the portability and performance make this an ideal option for a professional or student. The Patriot Pro ships with an iPad Pro, charging cable, stand, printed user manual, and a carrying case from Patriot Vision Industries LLC for $3,995. The Cyber-Shot camera may be purchased separately from Patriot Vision.

This article is made possible in part by generous funding from the James H. and Alice Teubert Charitable Trust, Huntington, West Virginia.

Comment on this article.

Related articles:

More by this author:

October 2020 Table of Contents

Popular Web Conferencing Programs Part 1: WebEx

Jamie Pauls

Like many others in the blind community, I have become comfortable using Zoom to communicate with others. It has been ages since anyone has asked me to use Skype for this purpose. I almost never chatted online with my sighted friends using anything other than Facebook Messenger, but when COVID-19 brought everything to a screeching halt, that changed. I felt pretty good when I learned that my church's small group Bible study was going to use Zoom. I was a pro, or at least enough of one to participate in the group with no problems.

When it came time to think about the beginning of the new school year, the state of Missouri decided that therapists at the state school where I do music therapy would need to do therapy virtually. Also, we would use WebEx to connect with our students. Immediately, my brain went into overload and began spinning in two directions at once. First, how on earth would I do music therapy virtually? Second, how accessible was WebEx? If it ended up not being useable with a screen reader, would I pretty much be out of a job? I began reaching out on social media and doing a bit of research. I quickly learned that the WebEx platform is in fact accessible, although there are a few quirks to be aware of. This article isn't meant to be a tutorial on using WebEx, but it should get you started if you find yourself needing to use this platform.

Signing Up and Signing Into WebEx

Since I would be scheduling sessions, inviting students to those sessions, and hosting each session, I needed to create a free WebEx account. The best thing I can say about this process is that I literally have no recollection of actually doing it. The process was about as straightforward as it gets. Although not difficult, signing in takes a bit more work.

JAWS is my primary screen reader, and I have had no reason to use any other screen reader when doing music therapy using WebEx. I am currently using the public beta of JAWS 2021 as I write this article, but I have used JAWS 2020 most of the time that I have worked with the WebEx platform.

This is as good a time as any to say that I have done all my work using the Web version of WebEx. The desktop application appears to be much less accessible than the Web app. Everything discussed from this point on will be from the context of using WebEx with Microsoft Edge. I will also describe things from my personal vantage point, as your experience might differ slightly depending on your setup.

When I first load the webpage, I generally bring up the list of links in JAWS and quickly type the first few letters of the words "sign in." Pressing Enter brings me to the proper place. One disadvantage to this approach is that I am not always told that the sign-in option is collapsed. Doing a JAWS find command and looking for the word "sign" brings me to the right place, and I am given the status of the option. When I expand the sign-in option, I must choose either WebEx Meetings, or WebEx Teams. I always use the Down Arrow key to choose Meetings and press Enter. Next, I am taken to the edit field where I can enter my email address, and I press Enter again. Instead of automatically being placed on the Password edit field, I have to Tab to it, enter my password, and press Enter. At this point, I am logged in to the service.

Scheduling a WebEx Meeting

If you are a Zoom user, you know that you can start a meeting on the fly and invite people to join. You can do this with WebEx as well, but I've not played with this option much at all. I have more experience with scheduling meetings for a future time. Once I have logged into WebEx, I find myself in my personal meeting room. You can poke around there at your leisure, but we will press the letter H a couple of times to move by heading to "Upcoming Meetings." Press Up Arrow until you get to the button that allows you to schedule a meeting, and press Enter.

Here you will find a series of edit boxes, buttons that can be expanded, and at least one checkbox. The "Meeting Type" option lets you choose from WebEx Meetings Pro 3 and WebEx Meetings Pro 3 (end to end encryption VOIP only). I have no reason to change the meeting type from the default of WebEx Meetings Pro 3. Be aware that if you use up and down arrow keys to make changes to options in WebEx, you pretty much always need to press the enter key in order to get those options to stick. If you don't you will find yourself quite frustrated in a short amount of time. Next, Tab to the edit field that allows you to type a meeting topic. This cannot be left blank. For this example, I called my meeting Test Meeting. You can next Tab to the meeting password which WebEx will create for you, or you can create one of your own. I just let WebEx choose a password for me. Next you will Tab to a button that reads a suggested meeting date and time. The maximum length of a meeting when using a WebEx free account is 50 minutes. Press Enter on this button to begin making adjustments. You will find buttons that take you to the previous and next month. Otherwise, just keep Tabbing until you reach the date grid. Here you can make changes with all four arrow keys. To advance the meeting time one day, just press the Right Arrow key. Next, Tab to the hour field and press Down Arrow to expand it. Choose your start hour and press Enter. Next, Tab to the minutes list and do the same thing you did with the hour list. Again, press Enter. Next, Tab to a couple radio buttons that let you choose AM or PM. No need to press Enter here. Next, Tab to move to the fields that let you determine how many hours and minutes long the meeting will be. Remember to press Enter each time you make a change. With only 50 minutes maximum using a free account, I never mess with the hour area of the meeting duration menu. Finally, press Tab to get to the Done button and press Enter. You might think youÕre done, but you are not. Another press of the Tab key lets you choose your time zone. I recommend going into settings and changing this permanently if you are going to schedule a lot of meetings. Next, you can check a box that determines whether or not the meeting will be recurring. If you check this box, you can determine the recurrence pattern much as you would in any calendar program. Next, tab to an edit field where you can invite up to 1,000 attendees to your meeting. That's a lot of typing if you ask me!

It has been my experience that if I press Shift + Tab to review a setting I have made, I get thrown completely out of the dialog and have to find my place again. Not a big deal, but definitely something that needs fixing in the future.

Next, you can Tab to a link that offers more advanced options, which I honestly haven't ever felt the need to play with. They include audio connection options and Agenda, just to name a couple. Finally, you Tab to a schedule button. Your meeting has been scheduled.

Starting and Managing a Meeting

From within my personal meeting room, I can Tab to a list of upcoming meetings. It is also possible to see meetings that were scheduled earlier than the time you are viewing. Pressing Down Arrow places me in a grid with the name of each meeting and an option to start the meeting. I could move through this list with the Down Arrow key, or I can use table navigation commands to move up and down in a column or right across the rows. Each meeting topic name is a link. Pressing Enter here will let you do a number of things including editing the meeting if needed.

In my case, I chose the topic Test Meeting and moved right to Start Meeting. When on this option, I pressed Enter.

From here I could adjust audio and start my video if I desired. At the bottom of the screen is the Start Meeting button. For me, this brings up a quirk that can make WebEx very frustrating until you figure out what is going on. When I press the button to start the meeting, I am asked to confirm that I want to use my laptop's camera. I do, but now I must find another Start Meeting button and press Enter on it as well. At this point, I hear two ascending tones that let me know my meeting has started. The need to issue a command twice happens every now and again with WebEx, so just be sure to read your screen carefully.

Buttons to view the participants list, chat with others, and mute your audio are all well labeled. Unfortunately, you don't get a lot of feedback in WebEx when you are doing things like chatting with others.

I need to share audio and video with my students, so I needed to get the hang of sharing content using WebEx. After pressing the Share Content button, I see that my share screen will be optimized for text and images. Pressing Enter on this option opens a menu that allows me to optimize my screen for motion and video. I must press enter to make this change stick. Next, I see buttons to share my screen or share an application. I haven't been able to get the Share Application button to do what I want, so I just share my screen. Share Entire Screen is selected, and that is fine with me. Now, I must check the box to share computer audio. Finally, I must press the Share button. I get no feedback that this has worked, but I have done this several times successfully. I can play audio with no problem, but my infrequent attempts to show video haven't worked when using WebEx. Zoom is still my go-to program when I want to share audio and video with my students. Fortunately, the state now allows therapists to use other platforms besides WebEx if they choose. When I am done, The Stop Sharing button quickly allows me to stop sharing my screen.

When my meeting is over, I press the Leave or End Meeting button. End Meeting is a button, but the Down Arrow key allows me to assign a host and end the meeting. I generally press the End Meeting button. I am now prompted to confirm that I wish to end the meeting for all participants. The End Meeting choice is not an obvious control, but pressing Enter on the text stops the meeting.

The Bottom Line

When I began working with WebEx, I was very concerned that I would have major problems with the platform. This has in fact not been the case. I still prefer Zoom because I believe it is easier to use, you receive more feedback from the platform itself and support is provided by Vispero and Brian Hartgen. Sharing my screen is definitely easier with Zoom. For some reason, the teachers at the school where I work occasionally have trouble getting Zoom to connect on their students' iPads. WebEx rarely has this problem, so I use both WebEx and Zoom on a regular basis, with WebEx being my primary Web conferencing platform at school. It could use some TLC, but it definitely works from a screen reader user's perspective. I have visited with people who use NVDA with WebEx, but I donÕt know how it works on the Mac.

If you need to host meetings longer than 50 minutes with more than one host, there are a number of plans available starting at just $13.50 per month.

If you find yourself in a situation where you are required to use WebEx, I hope this article will get you up and running.

Additional Resources

Here is an article on using WebEx with JAWS that may be of some help.

Here is an article on using WebEx with JAWS and NVDA written for those who are students only. Instructions are for using the desktop application. Your mileage may vary.

This article is made possible in part by generous funding from the James H. and Alice Teubert Charitable Trust, Huntington, West Virginia.

Comment on this article.

Related articles:

More by this author:

October 2020 Table of Contents

<i>AccessWorld</i> News

News for News Junkies from NFB-NEWSLINE!

Bill Holton

If you are an NFB-NEWSLINE® subscriber and make use of the organization’s free iOS NFB-NEWSLINE Mobile app, you may have noticed some significant changes to the interface in the newest Version 3.0 release. The app is now presented in four pages with a slider control to move from page to page. The main homepage offers buttons to access your local weather report, a “What’s new” button, and a link to breaking coronavirus news. A list of your “Favorited” publications also appears on the homepage for quicker access.

Page two includes links to the complete roster of over 500 NEWSLINE publications, TV listings and “Breaking news articles.” Once you have located and opened a NEWSLINE newspaper or magazine article, either in Breaking News or in the standard periodical menu, you will discover that in this new release, each of the articles appears in its own link, with a brief preview pane. They are no longer grouped together with heading markers between clips. Access the full article by double tapping the article title. At the top of each article you will now also find a “Share” button. However the choices are limited. You can only share a NEWSLINE article to another reading app, such as Voice Dream Reader or Kindle, or send a copy to yourself or another contact via email or message. Remember, according to the NEWSLINE terms of service, the recipient must also be a NEWSLINE subscriber.

There is one exception. The original Web links to articles that appear in the app’s “Breaking News” section can now be shared via Facebook or Twitter. This is not accomplished via the normal share sheet, however. Instead you must use the Facebook or Twitter buttons at the end of the article.

Now for pages 3 and 4 of the new NFB-NEWSLINE app, and this is the release's premier new feature. The organization has added a free copy of KNFB Reader Basic to the NEWSLINE Mobile app. KNFB-Reader is a text recognition app with features tailored for the specific needs of people with visual impairments. For example, the app will automatically adjust for text that is tilted or even upside down. We originally took a look at the KNFB Reader in November 2014 in the AccessWorld article entitled, KNFB Reader for iOS: Does This App Live up to All the Hype? Our answer to this question was an enthusiastic "yes."

Since the publication of our first look, other players have entered the blind-friendly text recognition arena. Most notable among these are Seeing AI, free from Microsoft, and Voice Dream Scanner from the developers of Voice Dream Reader and Voice Dream Writer. The full standalone version of KNFB Reader is priced at $99.99.

The Basic version lacks some of the advanced features. It does not, for example, provide the same precise field-of-view report. It only recognizes English text, and does not include the same file save options as the full version. You can set whether KNFB Reader Basic will automatically recognize and/or speak text, as well as set the text reading speed, by swiping your way to page 4 of the app.

“The basic version is really meant for quick, on-the-fly reading, such as when you need to distinguish two different packages of frozen foods,” says Scott White, NFB Director of Sponsored Technology Programs. 

The free NFB-NEWSLINE app is available for iOS devices only. You will also need a free NEWSLINE account, which requires certification of your disability. Learn more at the NFB NEWSLINE website.

NVDACon Call for Session Topics

The NVDACon International planning committee would like to invite you to submit session topics for the upcoming NVDA community conference (NVDACon). The conference will be held December 4-6, 2020. NVDA, NonVisual Desktop Access, is a piece of software that has changed the lives of thousands of people with visual impairments worldwide by providing access to the Windows operating system at no cost. As an open-source project, NVDA is backed by a large and dedicated community. The NVDA community is unique due to the fact that visually impaired and non visually impaired people work together to improve accessibility on Windows and to boost efficiency when working with third party applications. NVDA is not only a piece of software, it is a social movement that has spread around the world.

The NVDA community conference (NVDACon) underpins the social interaction among users, developers, institutions, and stakeholders. Each year, the stakeholders in this community meet at the online conference and discuss or present interesting topics related to accessibility and the NVDA screen reader.

If you or an organization you represent are interested in presenting an exciting topic about NVDA, please submit your topic to the NVDA Con Planning Committee, at info@nvdacon.org, by November 7, 2020.

Three presentation types are available for the conference:

  1. Thunderclap Tweets: short news segments that are about 30 seconds each and that will be compiled into a15-minute news feed. Ideal for promoting your new add-ons or updating the community on new features.
  2. Lightning Talk: This style of presentation is a 15- to30-minute talk, with limited time available for questions and answers. One session will include two or three Lightning Talks.
  3. Full Blast Sessions: These are usually 60- to 90-minute presentations, ideal for a more in-depth look at a topic.

October 2020 Table of Contents

Letters to the Editor

In this section, we publish letters submitted by AccessWorld readers on a range of topics. If you would like to submit a letter to the editor, you can do so by sending an email to the Editor, Aaron Preece or by activating the "Comment on this article" link at the bottom of any article.

This month's messages are all in reference to Jamie Pauls's September 2020 article, Victor Reader Stream, a Product Worth Considering—Or Reconsidering.

Dear AccessWorld Editor,

I have had the 2nd Gen Victor Reader Stream for 7 years now and I love it! It is the one piece of technology I can honestly say I use every single day, even when away from home. It is so handy! I love its ease of use. I use it to listen to NLS books, podcasts, and Internet radio stations. I have also used it to record short notes and to download music. I appreciate the ability to use Wiktionary and Wikipedia using the Stream when I am listening to a book and want to look up the meaning of a word or to find out additional information about a particular topic. It is totally worth the cost, and if mine ever stopped working I would immediately purchase another one.

Candy L.

Dear AccessWorld Editor,

I was lucky that there were Amazon resellers that may sell the VR Stream, for a little lower than $350, which was how I was able to get a hold of the 2nd generation VRStream over a year ago, after I found out that you can't get battery replacements anymore for the 1st generation VR stream.

As much as I love my iPhone—and it's great to access BARD and other services through iOS—I still prefer to do my talking book reading using the Victor Stream, with no interruptions from notifications that you have to reach over and make shut up.

And yes, I am a proud supporter of keeping physical buttons alive too—they are more accurate than the tapping and swiping over a smooth surface, and more direct.

One thing I like to do...is, if I'm on hold with some company and I know the hold time is going to be quite some time, I'll put my phone on speaker and grab good ol' reliable Vicky, and enjoy reading whilst at the same time monitoring for that representative to finally get to me.

Joy

Dear AccessWorld Editor,

I love my Victor Reader Stream! It's now got 70 books on it, and I can read them without interruptions from Facebook, or Messenger, or Apple News telling me something I can eventually find out anyway I can relax and read at night without interruption. I love it, and don't plan to get rid of it. The Victor's already on its second battery! Thanks for this article. I'm glad there are others out there like me.

Sharon Geddes

Dear AccessWorld Editor,

For me, the Victor Reader Stream is not worth the price. I demand higher audio quality for that price. Its frequency response is only down to 50HZ, and the top I think stops somewhere around 10K, maybe 12.

Yes it's nice that it records in .wav but again it's not worth the price for what you get.

If they put better audio components in it, then it'd be worth a second look.

I tried this thing and my first thought was, "Wow…. $395 for this kind of audio?" I can get an MP3 player from talkingmp3players.com with better audio than that. I can get an iPod, which will have better audio than that, for less money (if I only need 32GB.)

Nah. No good. Give me high quality audio, then let's talk. If it's gonna be a music player and recorder on top of playing speech recordings, then its audio section needs major improvement. I think I would have kept it or at least considered keeping it if the audio was better. That means the DAC, the mics, etc.

That being said, most would not notice, and the only way I got these specs was through calling Humanware and asking.

This device is great for some, but not for anyone who cares about audio. It is a specialty blindness product whose primary function is spoken-word audio with that extra stuff included as niceties.

John

Dear AccessWorld Editor,

I am in strong agreement with this article. The Victor Reader Stream is definitely my go-to device when accessing audio/text content. For me, having a dedicated device for reading/listening meets my lifestyle.

I would like to see the device receive more updates/features. My wish list would include the ability to perform voice dictation in text entry fields and the ability to pair to a Bluetooth keyboard.

Jeff Harrington

October 2020 Table of Contents